
Successful PVC roofing sheet installation depends on five connected details: roof slope, поддержка макета, sheet overlap, fastener control, and allowance for thermal movement. The exact dimensions must come from the selected profile’s installation guide and the project’s structural requirements.
PVC is not metal. It responds differently to heat, point loading, drilling, and overtightened screws. Installers who treat it as a light version of a steel sheet can create cracks, distorted laps, or leaking fastener holes before the roof enters service.
Confirm the Exact PVC Profile Before Setting Out the Roof
Start with the approved product drawing. Record the total sheet width, effective coverage after side lap, глубина профиля, available length, recommended roof slope, permitted support spacing, side-lap arrangement, end-lap requirement, and matching accessories. The planned PVC roofing sheet product page defines the product category, but the order-specific drawing must control installation.
Do not calculate roof quantity from total width. Use effective coverage and include the intended overlap. Check the roof diagonals before laying the first sheet. A frame that is out of square forces each following sheet farther away from the designed lap.
Design the Supports for the Selected Sheet
Purlin or batten spacing affects deflection, дренаж, fastener load, and the installer’s ability to control the lap. Use the spacing supplied for the exact profile, толщина, load case, and climate. A value copied from a steel roof or a deeper PVC profile may not be suitable.
Supports should present a straight, clean bearing line. Remove sharp projections and correct major height differences before the sheets arrive. Misaligned supports can twist the sheet and leave side laps partly open. The structure and fastener pattern must also account for local wind action and edge-zone loads.

Store and Handle Sheets Without Creating Hidden Damage
Support long sheets during unloading and carrying. Do not drag one sheet across another when abrasive dust or sharp debris sits between them. Store stacks on a level, supported base and protect them from uncontrolled heat buildup, strong wind, impact, and contamination.
Plan safe access before installation. A PVC sheet should not be treated as an unrestricted walking platform. Use approved working platforms or load-distribution methods and follow the supplier’s safety instructions. Small edge cracks created during handling can grow around a fastener or lap under repeated movement.
Cut and Drill With Thermal Movement in Mind
Use tools and blades suitable for plastic sheet. Support the material close to the cut to reduce vibration and chipping. Remove swarf from the roof because debris can obstruct laps and drainage paths.
Plastic roofing expands and contracts as temperature changes. Hole preparation, fastener position, and movement allowance must follow the product guide. Where the system calls for pre-drilled clearance, the hole should be centered and clean rather than torn by forcing a screw through the sheet. Do not invent a universal clearance value; sheet length, профиль, цвет, temperature range, and fixing design all affect the requirement.
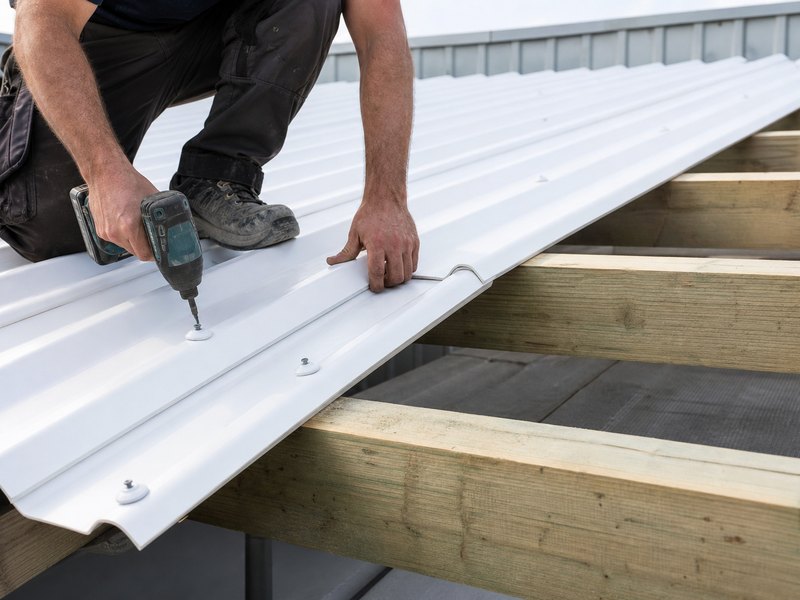
Control Fastener Position and Washer Compression
Use compatible roofing screws and broad sealing washers specified for the system. Keep fasteners aligned with the support beneath the sheet. A screw that misses the purlin cannot deliver the intended clamping or wind resistance.
Tighten the fastener enough to seat the washer evenly, but do not crush the profile or squeeze the sealing material out from under the washer. Overtightening locks the sheet locally and can distort the surface around the hole. Undertightening leaves a path for water and allows the sheet to move under wind.
Follow the manufacturer’s profile-specific instruction for whether fixing occurs at a crown, долина, or designated fixing point. Different products use different details. The existing UPVC roofing sheet page covers a more rigid PVC category; its installation assumptions should not automatically be transferred to every standard PVC profile.
Lay Side Laps in a Consistent Sequence
Begin from the correct roof edge for the prevailing weather and site plan. Keep the first sheet square to the eave and ridge because every later sheet follows it. Check alignment repeatedly instead of correcting a large accumulated error at the final bay.
Allow the designed number of corrugations or profile steps at each side lap. The mating profiles should sit naturally. Forcing a distorted lap closed with extra screws stores stress in the material and can open another part of the joint.
Plan End Laps and Water Paths Together
When the roof length requires more than one sheet, locate end laps over suitable support as the system instructs. The required lap depends on slope, профиль, exposure, and the sealing design. Lower slopes generally demand more careful water control, but the approved product guide must provide the actual detail.
Stagger joints only when the system permits it, and avoid creating thick four-sheet intersections that prevent profiles from nesting. Sealants or tapes must be compatible with PVC and placed where the detail specifies. More sealant cannot compensate for a poor slope, reversed lap, damaged profile, or unsupported joint.
Finish Ridges, Eaves, and Wall Junctions as a System
Many roof leaks begin at a change of direction rather than in the field of the sheet. Match ridge caps, barge or side trims, eave details, and wall flashing to the profile. Maintain the drainage path and avoid closing ventilation routes that the roof assembly needs.
At penetrations, use a designed flashing or boot rather than cutting an oversized hole and filling the gap with sealant. Consider movement between the sheet and the penetration. Large fixed details can restrain the PVC panel as temperatures change.
Check the Roof Before Handover
Inspect the completed roof from safe access points. Look for uneven washer compression, missed supports, cracked holes, open side laps, distorted end laps, blocked drainage, loose swarf, damaged edges, and incomplete flashing. Confirm that ridge and eave pieces remain aligned and that all temporary protective materials have been removed.
After the first period of hot weather and heavy rain, arrange a follow-up inspection where practical. Early movement can reveal an overtightened point, a loose washer, or a drainage problem. Maintenance should keep gutters and water paths clear without using harsh methods that damage the sheet.
Do Not Ignore Project-Specific Limits
PVC roofing may suit many agricultural, workshop, хранилище, canopy, and light-commercial applications, but the product still needs project approval. Check local rules for fire performance, wind resistance, structural loads, condensation control, and occupancy. The types of roofing sheet guide can help compare PVC with ASA, ПВХ, polycarbonate, and other systems before final selection.
PVC Roofing Sheet Installation Checklist
- Approve the exact profile drawing and installation guide.
- Calculate quantity from effective coverage, not total width.
- Verify slope, frame square, and support spacing.
- Protect sheets during storage, lifting, резка, and access.
- Prepare holes and movement allowance as specified.
- Use compatible screws and sealing washers.
- Control washer compression without crushing the profile.
- Keep side laps, end laps, ridges, eaves, and flashing aligned.
- Inspect fasteners, joints, дренаж, and damaged edges before handover.
- Confirm local code and project-engineering requirements.
The central installation principle is simple: let the roof drain, let the material move, and keep every connection compatible with the selected profile. That approach prevents many failures that are otherwise blamed on the PVC sheet itself.